Although to Christmas still left a lot of time, I thought that now I will present you, how to make step by step this decorative, painted wooden angel with parts of polymer clay.
The angel might be also the perfect gift for other different occasions.
You will need:
- The wooden peg doll 3,5" tall (8,9 cm) and 1,5" wide (3,8 cm).
- A white primer (gesso).
- A pencil.
- The acrylic paints (white, black, flesh color, blue, pink, brown).
- The thin round brush (for example, the size 1 or 2).
- The larger flat brush (for example, the size 10) for priming and painting the large surfaces.
- The permanent (waterproof), thin black pen.
- The polymer clay.
- A roller.
- The modelling spatula or toothpick.
- A knife.
- The heart-shaped cookie cutter.
- The glue gun or wood glue.
- Optionally a varnish or water-based lacquer.
- The heart-shaped wooden stand.
- The gold oil pen or gold acrylic paint.
1. Priming.
Paint the figurine with the white primer (gesso). This is not necessary, but using the primer makes the paint adhere better, and also the colors are more vivid.
2. Painting the face complexion.
Paint the face complexion using the flesh color.
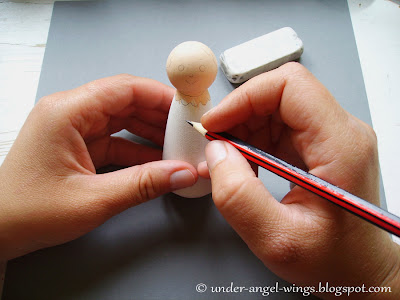
3. Sketching the face.
Using the pencil, sketch the general outline of the face and hair.
4. Painting the face: hair, eyes and nose.
Paint the face features with the thin, round brush (for example, the size 1 or 2). First
fill the eyes with white paint, then paint the blue (or using other
color) irises, black pupils and white reflections on the them.
Paint cheeks, lips and nose with the pink paint.
5. Finishing the face details.
Using the permanent (waterproof) thin black pen, paint the eyelashes, and mark the contours of the eyes. Instead of the pen can also be used a thin brush and black paint, but using the pen is more simple to apply.
Note: It is important the pen to be waterproof, because this way one can avoid to smudge during the varnishing.
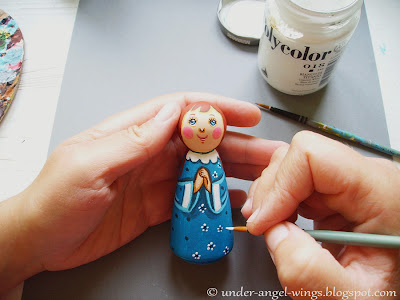
6. Painting the angel dress.
Paint the dress using one color, and then sketch dress sleeves and hands with the pencil. Outline the sketch with the paint in a lighter shade.
7. Painting the details of dress.
Using the thin round brush (for example, the size 1 or 2), paint the details of the dress (in this case the little flowers).
8. Making the aureole and wings of polymer clay.
Make the aureole of polymer clay. For this purpose, roll up the clay, and then cut the circle with the screw top. Fit the clay shape to the back of the angel head. Leave the aureole to dry for a few hours.
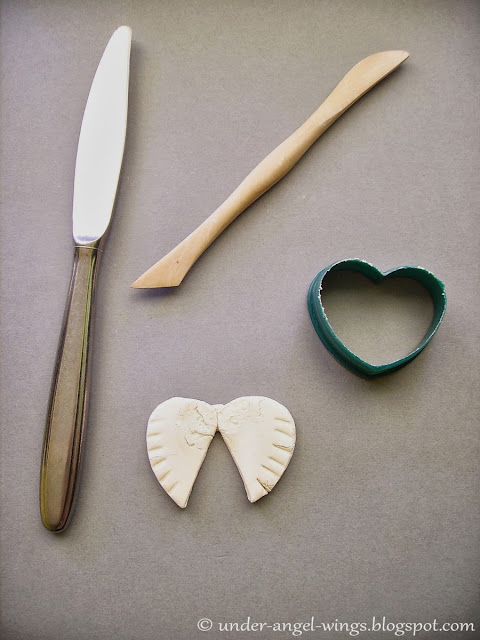
Using the small heart-shaped cookie cutter, cut the wings of rolled up clay. Cut the resulting heart in half with a knife, and on the outer sides of wings make the cuts with a modelling spatula or toothpick.
Adjust the wings to the shape of the angel back, so that later you can glue them better. Leave the wings to dry for a few hours. Paint the dry aureole and wings, for example, in white color. On the aureole surface paint the blue stripe. Attach the both parts to the body of angel with the glue gun or wood glue.
Finally you can varnish the figurine (or to lacquer) to protect it from moisture and dust, and also to saturate the colors.
9. Painting the wooden heart.
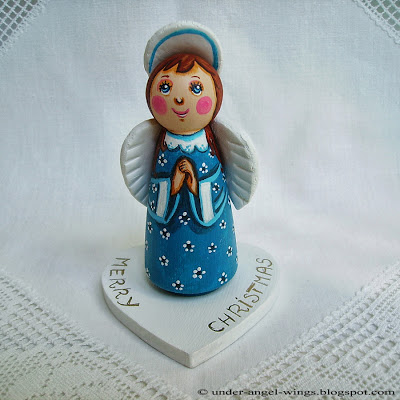
The angel figurine can be put on the stand. I have used the heart-shaped wooden stand, that I have painted white and embellished with gold oil pen.
And one more time the finished Christmas angel.
I wish you a successful and creative work :)


Beautiful! Thank you for sharing!
ReplyDelete